What’s the condition of your garage floor? Well, most old homes have concrete garage floors. And while, concrete is extremely strong – hence, lasts for a really long time, it will eventually wear. In some cases, there might be also cracks. In most cases, concrete floors get to a point that cannot be swept easily, while they are often stained. When the layer of concrete starts to go and damage happens, it won’t only be difficult to clean but there might be some safety concerns. For instance, there might be some bumps – not good, especially for the kids. And how about cracks? They will absorb moisture and before you know it, you may notice mold building up. A small disaster!
Assuming that you don’t like the epoxy garage floor appearance and insist on having a concrete surface, what do you do? It’s easy. You resurface the concrete garage floor.
How to resurface garage floor?
 Garage floor resurfacing is not particularly hard, although you need to have some knowledge about how to do such things. If you are not a handyman, if you don’t know how a brush looks like, don’t do it yourself. In this case, it’s best to find a garage door company and let them take over.
What it takes to resurface concrete garage floors? First of all, a concrete surfacer and some gear. You need a brush, a blower, a power drill with mixing blade, a spiked roller, gloves, a face mask, a steel float, shoes you don’t care to keep.
Now the methods of resurfacing garage floors are not all exactly the same. It mainly depends on the condition of the existing concrete floor and also, your expectations in terms of durability. If this is a high-traffic area, it’d be good to add primers too. And then, you need to decide on how thin the layer of the new concrete garage floor coating will be. It could be thin or extra thin (feather like).
Step Nb 1: you need to clean the concrete floor well. You can sweep to remove dust and dirt, or use the blower.
Step Nb 2: if there are stains, they must be removed. If there is stuck dirt or paint protruding, it must be scraped. You can also power wash the garage floor if you feel it’s dirty.
Step Nb 3: if you are using primers, do it with the floor dry and clean. Wait for it to dry and then apply a second primer in sections, prepare the concrete surfacer, and apply. Once you smooth the concrete resurfacer, use the spiked roller to let the trapped air be released. Repeat till the floor is all covered.
The third step can be avoided if you don’t care to set primers. And so, after you clean the floor, you can mix and apply the concrete surfacer with the steel float.
Always wear gloves, the face mask, and the old shoes to be safe and don’t mind getting dirty.
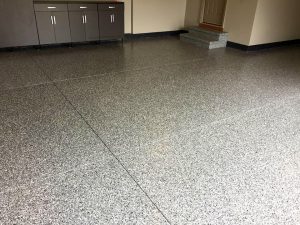
The good news? The new concrete garage floor will be ready shortly and the looks of the garage dramatically improved, while all the bad effects of its previous problems gone.
Tips to make the garage floor resurfacing successful
 Take care of the cracks – if there are any, before you start resurfacing the garage floor.
While the actual resurfacing the garage floor project will only take you a day, removing everything you have in the garage may take you days. So, plan well, especially if your free time is limited.
Although this is a fairly uncomplicated job, it’s not easy if you haven’t finished garage floors or drywall before. Pay attention when you pour the concrete surfacer. It must be spread smoothly. Since it dries relatively fast, you need to smooth it and use the roller to release the trapped air, and then let it be. Don’t use the roller once the concrete starts to dry, or there’ll be roller marks.
Now, if this is your first time, don’t be disappointed if you see some rough spots on the garage floor. After all, you can resurface the resurfaced concrete garage floor and this time, you will know how.